|
|
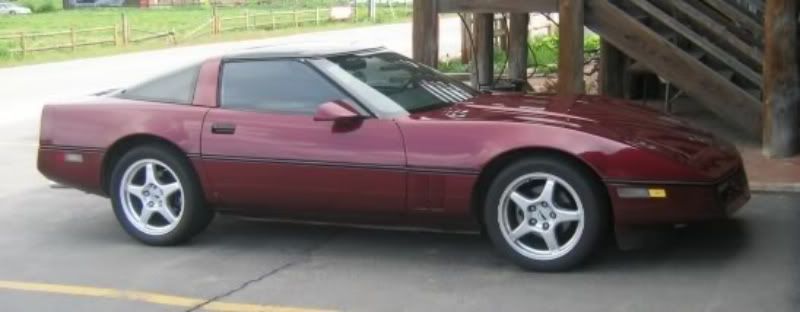
Post by tachout on May 30, 2011 14:08:27 GMT -7
Today I went out, trimmed the ears, drilled the mounting holes in the crossmember, and holes in the tunnel. Then I went and mounted the crossmember. Stupid cold and rain... I would have worked on adjusting the back of the car, and then welding the wheelie bars together, and getting them ready to sit in the corner till it heads to the track for the first time. Anyway here are some pictures of the crossmember boltin in place. I have not drilled the mounding holes for the transmission mount just yet... Want to first replace the trans mount, and get everything squared up. 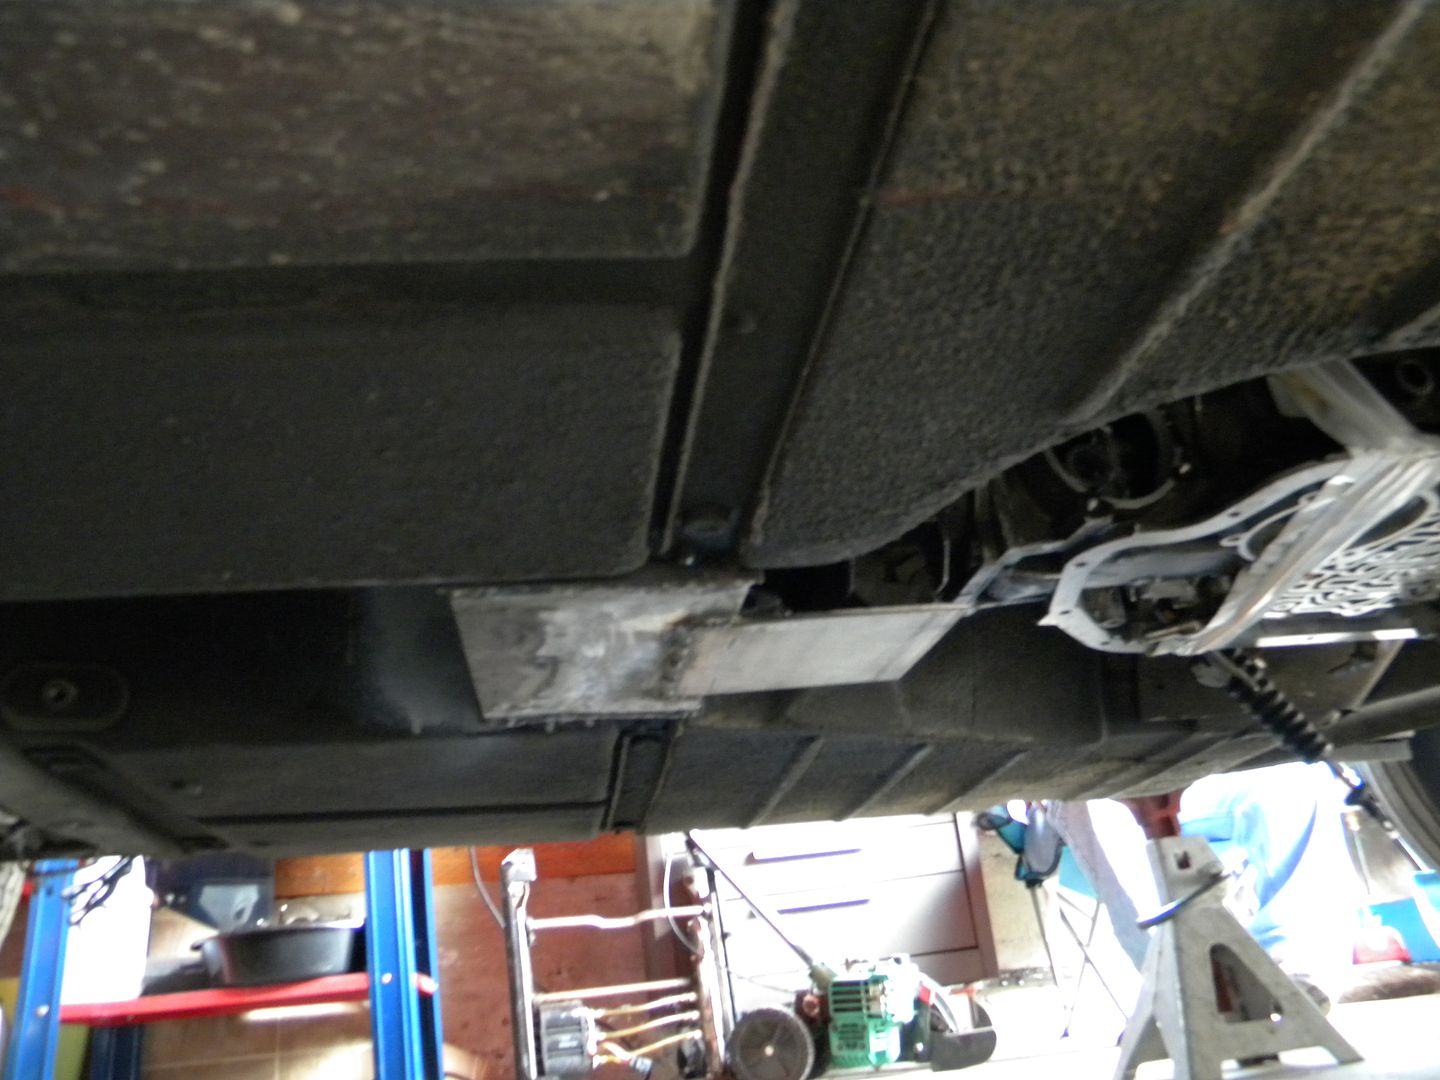 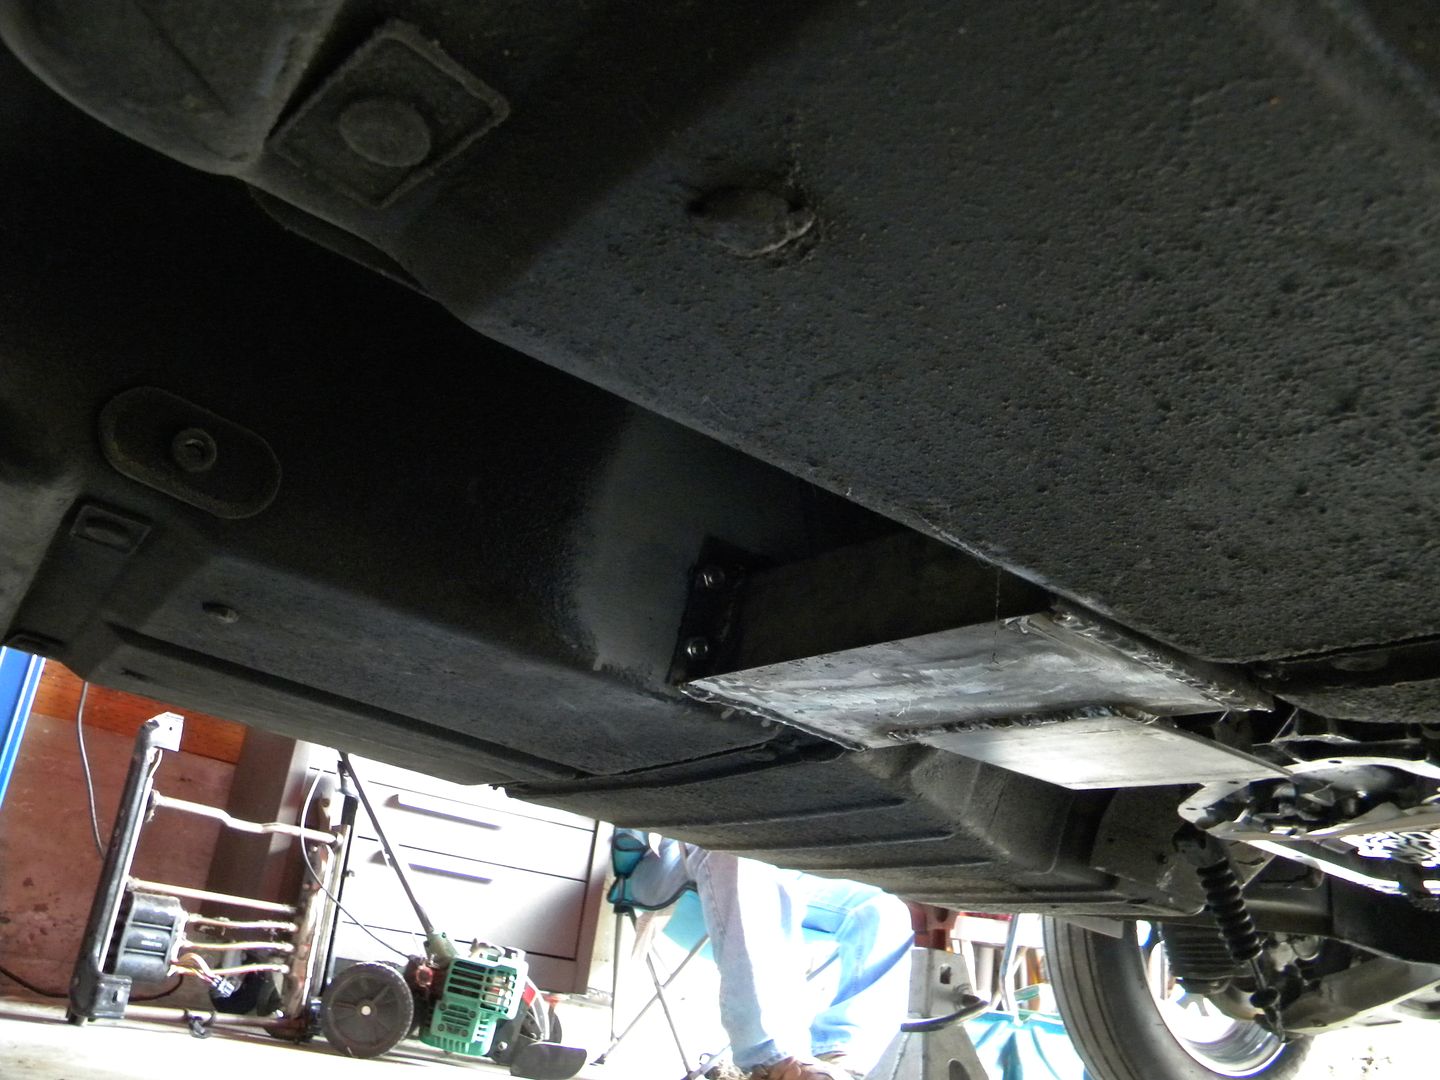 Now that it is set up, I can start to finish up the rear body work, and the tins. Hoping for good weather during the week, and this coming weekend. Would love to have the wheel tubs put in, and the rest of the interior tin complete, along with the rough body work in the back completed by end of June. Then for July Finish up the underside, and start to put all the interior back in, once I run a full new harness. A rewire with new wires, and correct guage is very important, and replacing everything that came in there stock will be easier to do from scratch, and much cheaper, expecially since I can then save the factory harnesses and resell them to someone that has another C4. I have been asked a couple of times..."Why not just buy a crossmember?" or "Why not just use the one that was already in there?" Well here is the simple answer... This car never had a Transmission Crossmember. It had a C-Beam that connected the trans to the rear diff.... Since I have a Ford 9" in the back, that floats, and I have a TH400 inplace of the 700R4 it all has to be scratch made. No aftermarket parts would work for this. It is amazing how many parts I have to fabricate to work for this car, and how much the aftermarket supports the Camaro and Mustang.... Guess there are not enough people modding these cars yet. Anyway here are a couple of shots I took with it just in the garage entrance. Thought on Memorial Day I would take a couple shots to enjoy for the next couple of weeks! 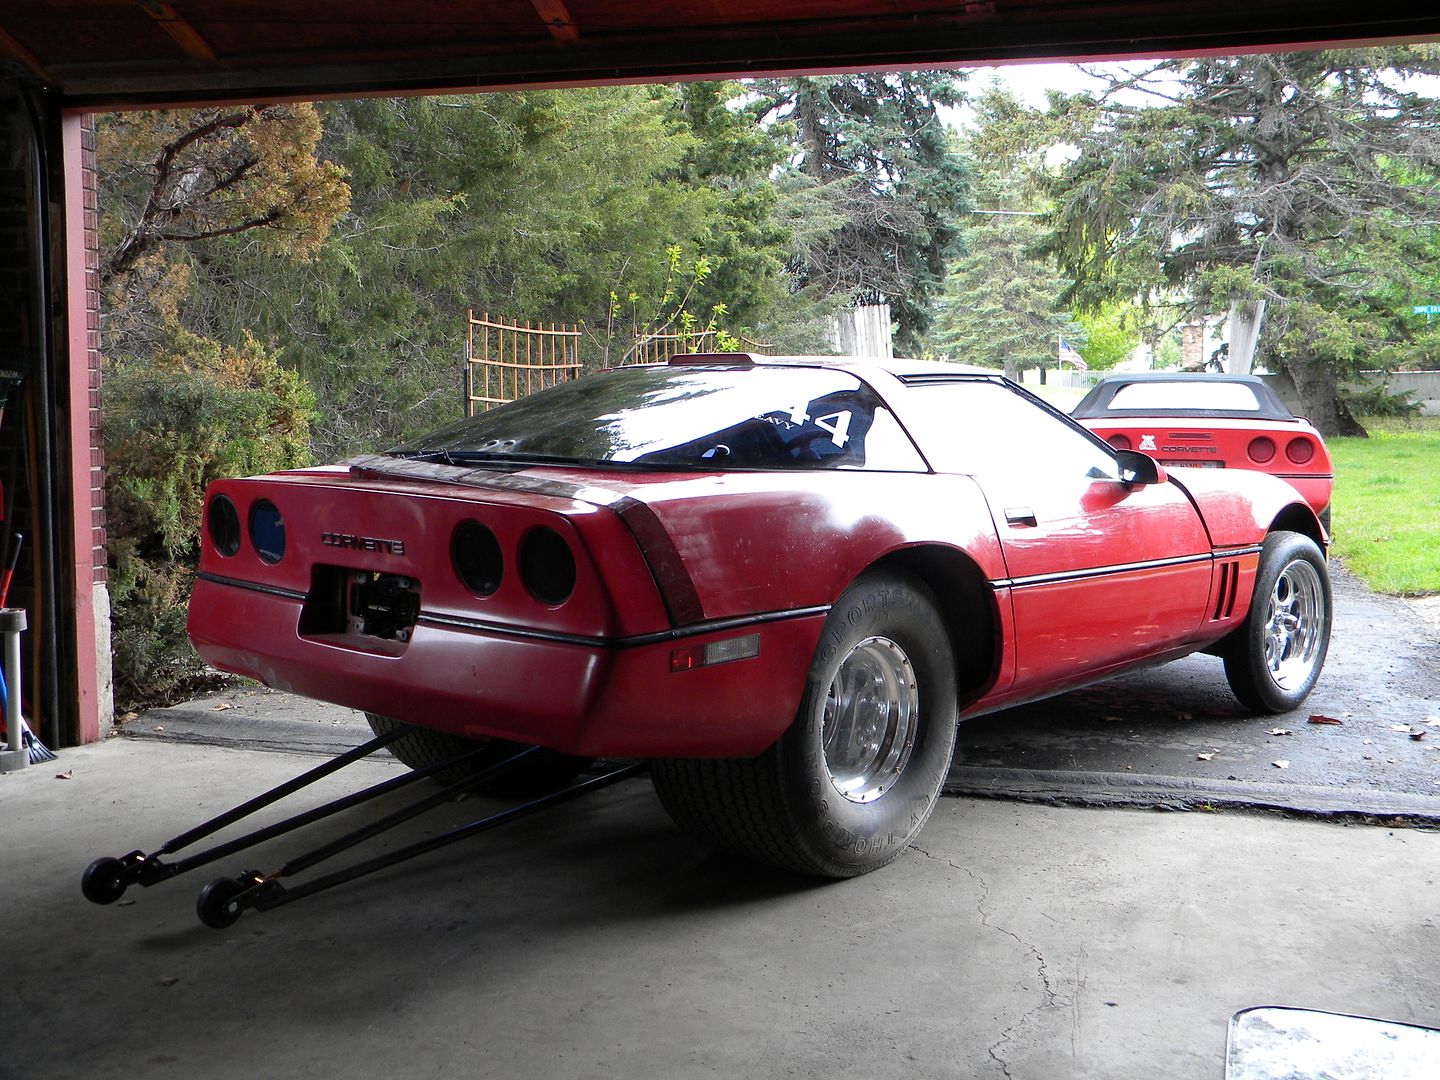 |
|
|
|
Post by tachout on Jun 4, 2011 10:34:18 GMT -7
Well today I am working with some great weather out there. Tonight when I get off, once I get dinner started (or Done depending on what we end up having) I am going to try to get my rear firewall template cut, and work on the body work this weekend. My goal is by the time I am done working Saturdays, I can have the rear of the body completed, wheelie bars completed and welded, and have the Wheel Tubs and rear tin work done. Have the sound deadening in the rear, and have the new rear carpet installed. If I can get that far, I will start with some of the electrical, and reinstall of the interior, and start getting that all buttoned back up. Mind you some of it will not get completed until I get a few parts in there such as belts, and all, but I plan on working till I am again waiting on the budget to get parts. Never know, I might just get this thing back together before I retire.
|
|
|
|
Post by 500hp406 on Jun 4, 2011 10:38:50 GMT -7
Mark, your doing it right, remember do it right, do it once. I am on Dumb S H I T, when you gonna do it right......It will be done when its done, then we will race, if I am not broken......
|
|
|
|
Post by tachout on Oct 19, 2011 18:40:08 GMT -7
As some of you know, I bought a Rotissorie. Below are a couple of pictures of it. I will need to rebuild the heads on it so they will bolt up to my Corvette rather than the mounting points that were for the guys first gen Camaro. Below are pictures of it as I got it. I am going to design a new set of heads for it that fit mine, and while I am at it, I will also do the rest of the Rotissorie in CAD. Once I have it all drawn up, and I have my heads designed for it, I will be more than willing to share my drawings. Beyond that, once I am done with what I need to do, I will be more than happy to loan it out. I will even help design a set of heads that will work for your project, and help you build them if you need. 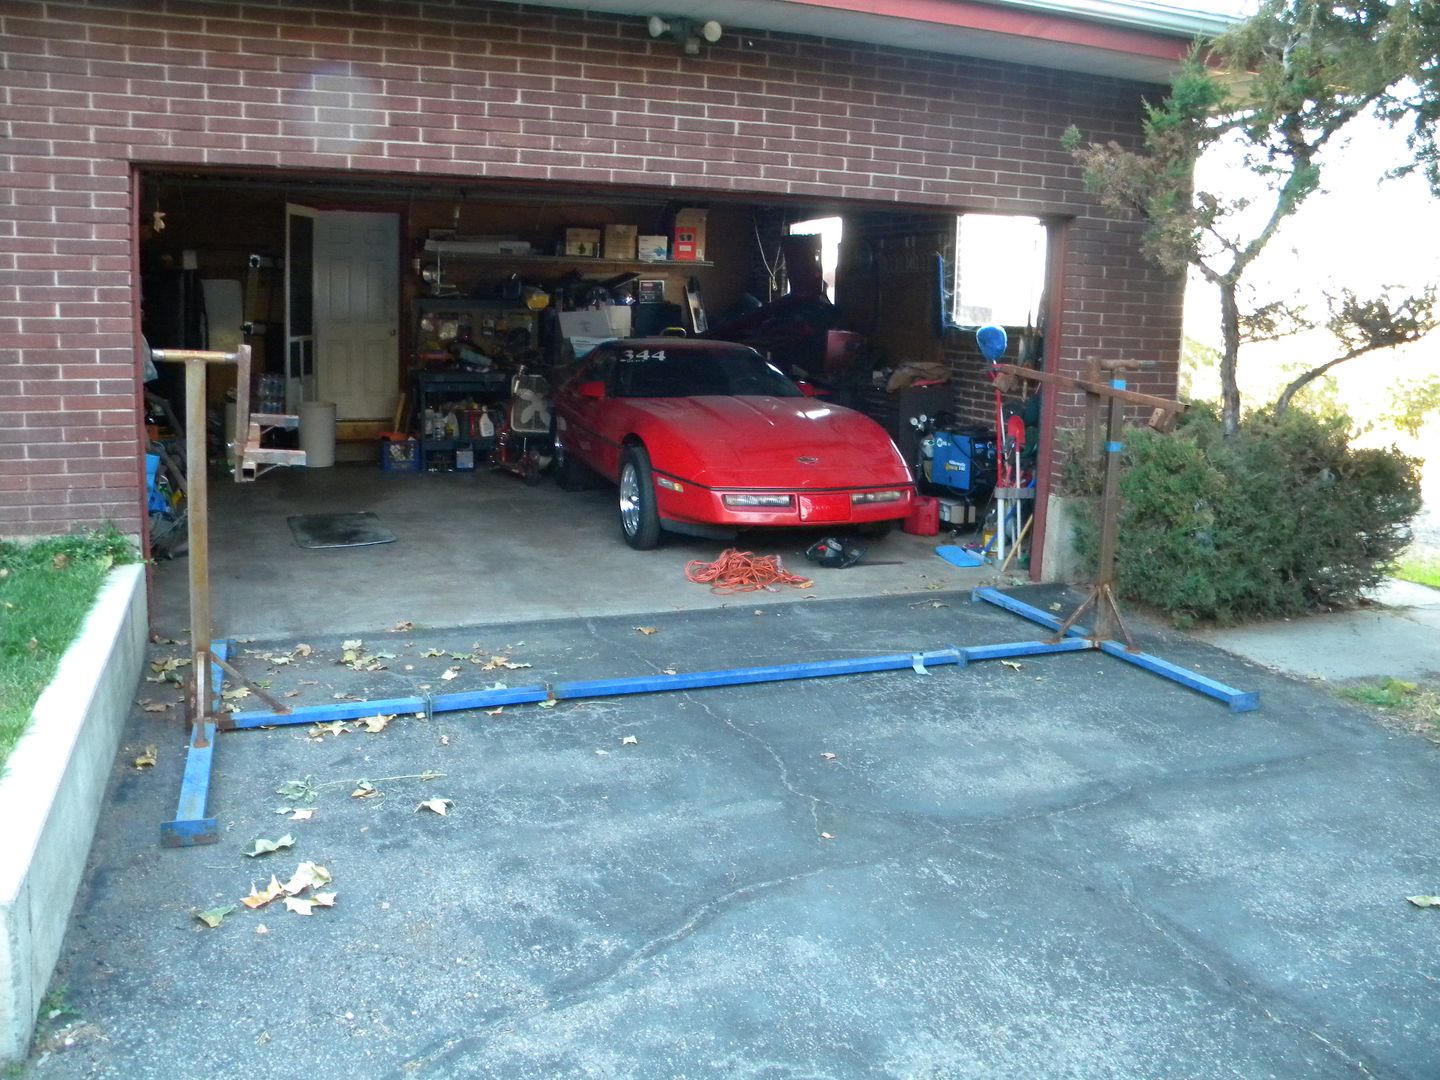 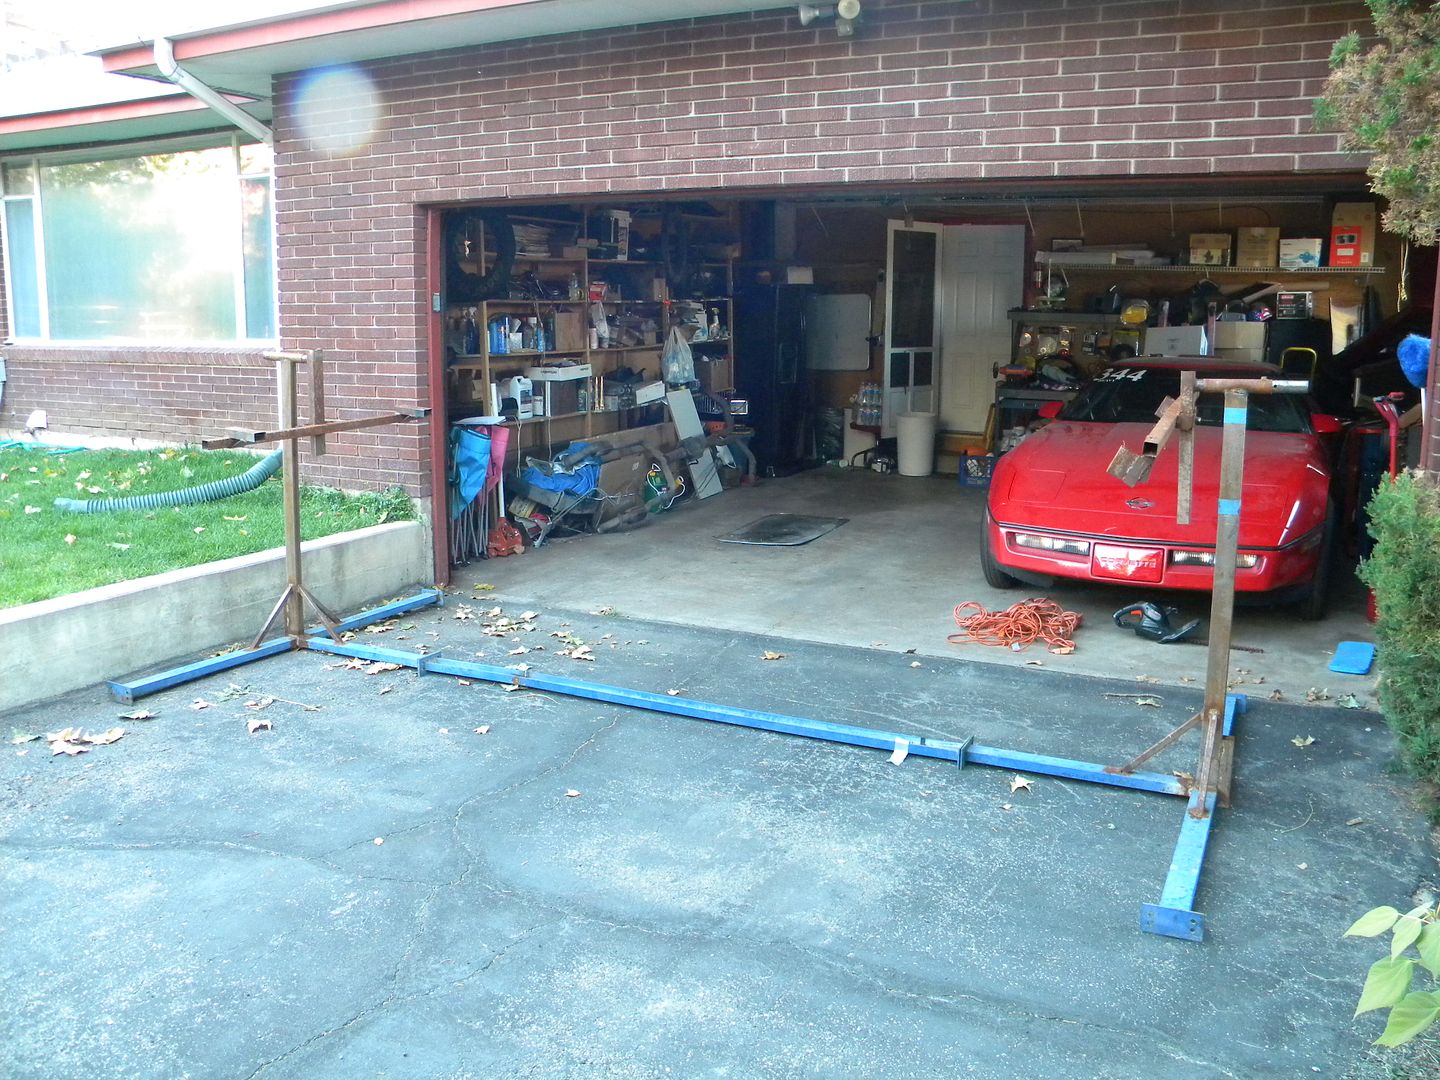 Very nice preliminary design to start with. I am guessing it will not take much to design this so it fits my Coupe. I will be putting wheels on it so once the car is up there, I will make it so it can be moved around. Goal is so the wheels can raise and lower, and that will not be too tough to design into it... I know how it is done. As for the heads, I just need to pull off the front bumper cover, and unbolt the front bumper, and will make a plate to bolt on each mounting point right where the bumper was originally mounted, and then in the rear, there is just a pair of open frame rails, and when I know where they locate, with the same style place, the it is a matter of knowing my centerline of the car, and knowing where the mounting points are in relation to the centerline. I do plan on making mine a little adjustable if needed but not much room to play. Have to be really close. Once I go to build it per my plans, I will make sure to actually build it as I mount to the car, and reverse engineer that end of the numbers to make sure everything is where it needs to be. |
|
|
|
Post by tachout on Oct 23, 2011 22:31:39 GMT -7
Today a new First for my Coupe! Today it wrinkled its first tire! OK so it was not because of power... it was just a fluke of tire pressure, and the rotation of the car but here it is. 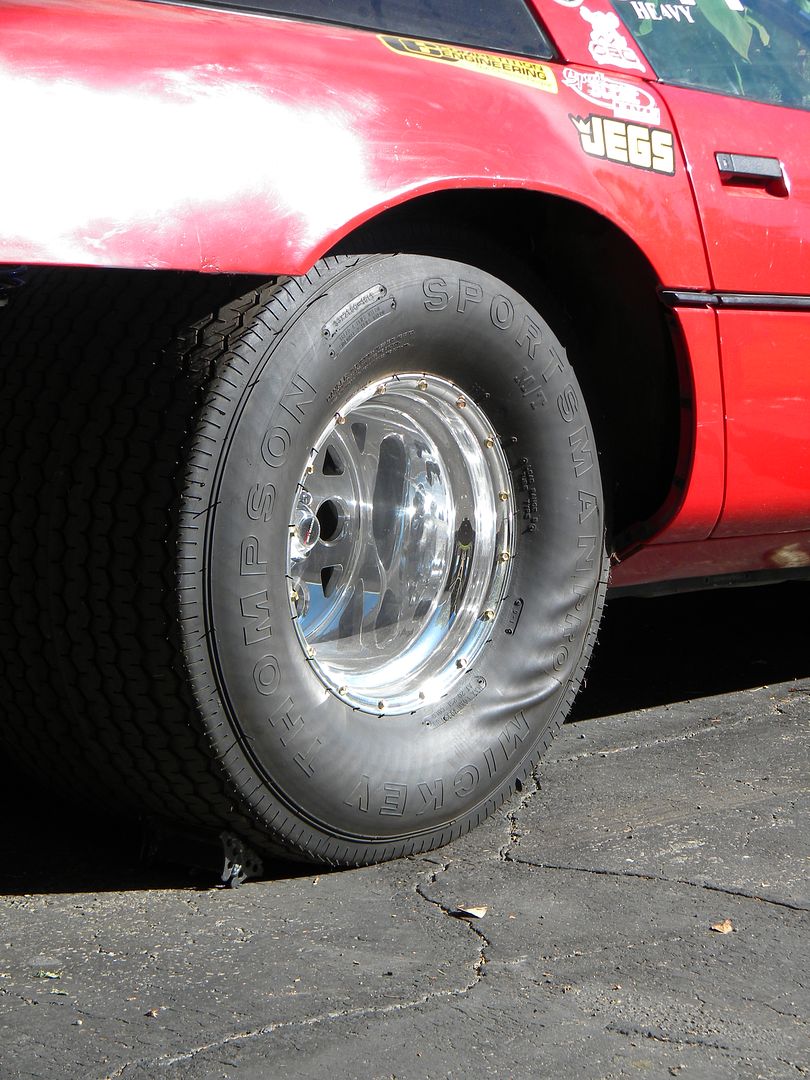 Beyond that I had a little time today to look at the rotissarie and do some math, and start on a design. Here are the few things I want to design, or change. 1. I need to design a head that will hook to the car on each end. 2. I want to put it on wheels so I can roll it around once I get it up in the air 3. I decided that I want to put both ends on Hydralics. Idea being to be able to roll up to the car in the full down position. Bold the heads on, and then jack it to the correct height to be able to rotate the car fully. I want to be able to have some room when rotating, and I want to be able to possibly lift it a bit more, but be able to let it down some when working in any position... Idea lower center of gravity, the more stable. 4. Make a chain drive so I can rotate with a crank handle and lock in any position of rotation. (Have a great idea how to do this using a timing chain I have laying around.) Plans are in the works, and when done, I will post up the plans, and will show the build... Once the car is up, and rotating, I want to get so I can get the rest of the body work done, and I want to be able to get in there and put in the rear tubs, and the rest of the interior tins, and allow for the fuel cell, rear electronics, battery location, and fuel pumps and all. Then plan on where the exhaust will run under the car. I want to clean up the trans mounting area, and do some work under the car with everything unbolted and out of the way. If I can do this by rotating the car, it will make all kinds of things easier to get to. To do this I am going to want to do the rotissorie, and then I am going to want to do the following to the car. 1. Remove Hood. 2. Remove Targa Top. 3. Remove Rear Glass. 4. Remove Engine and Trans. 5. Remove Seats and any loose stuff inside the car. 6. Remove front bumper cover. 7. Bolt on heads and lift car so front tires clear. 8. Remove front tires. 9. Remove bolts holding in rear suspension and rearend and rear tires. 10. Raise car a little more and then check stability. 11. Raise car up so it can rotate fully. |
|
|
|
Post by tachout on Dec 3, 2011 13:26:28 GMT -7
Today I worked on posting my build thread up on another forum, and it sure is depressing. I looked back at where I started, how long ago it was, and I sure have not made much progress. I have got a ton done, but when I was asked what I got done on it this year... I had to say I dusted it. WOW, I need to make some changes so I can start to work on it again. Sure has been a long time since I put money into the beast. Never know what will come up, but lets home some of what comes up are parts for this beast.
|
|
|
|
Post by tachout on Jan 28, 2012 13:18:09 GMT -7
For those that have not heard, I have decided to keep this thing, and will be working to try to finish it. Yesterday I landed a major part for it. I got the Enderle Fuel Injection unit. I got the hat, I got the pump, regulator, pump drive, distrubution block, and all the lines. Sure feels good to find a major part, and get a deal on it too. My son has also been really excited about this, and just loves opening the throttle plates.... Actually I am really looking forward to it to. 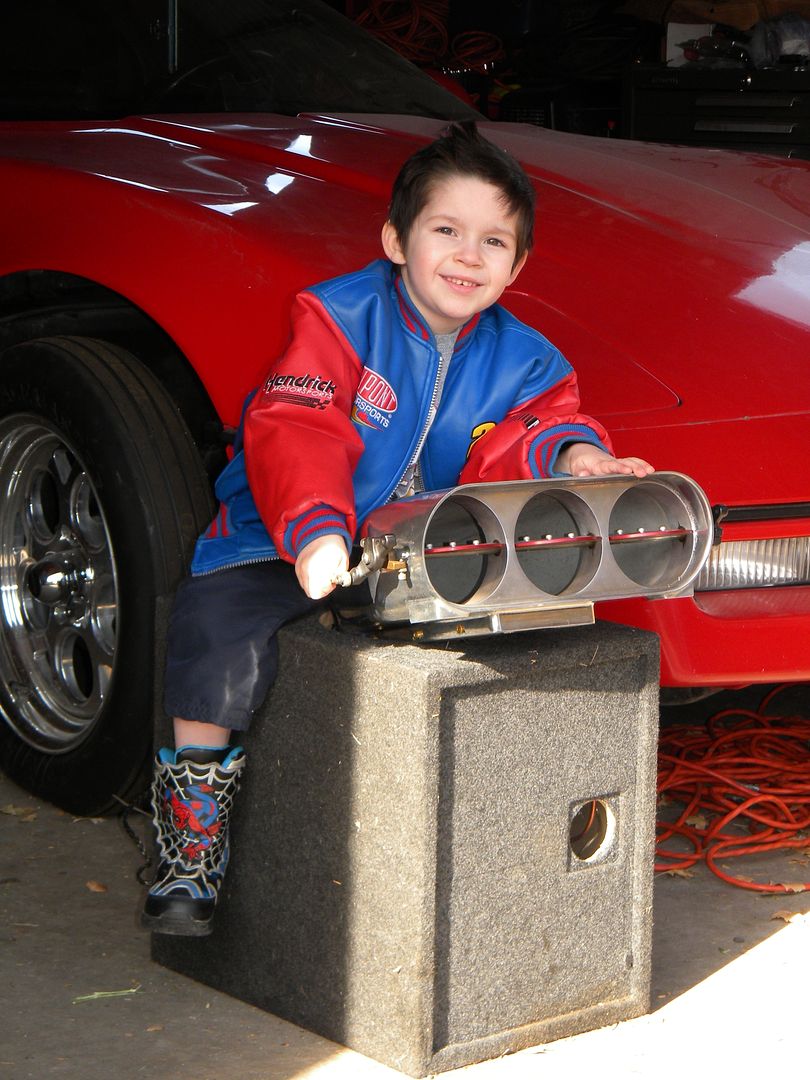 I just set it on the hood. I cannot wait till I have to cut the hood, just so the Blower can stick through, and this can sit on top! 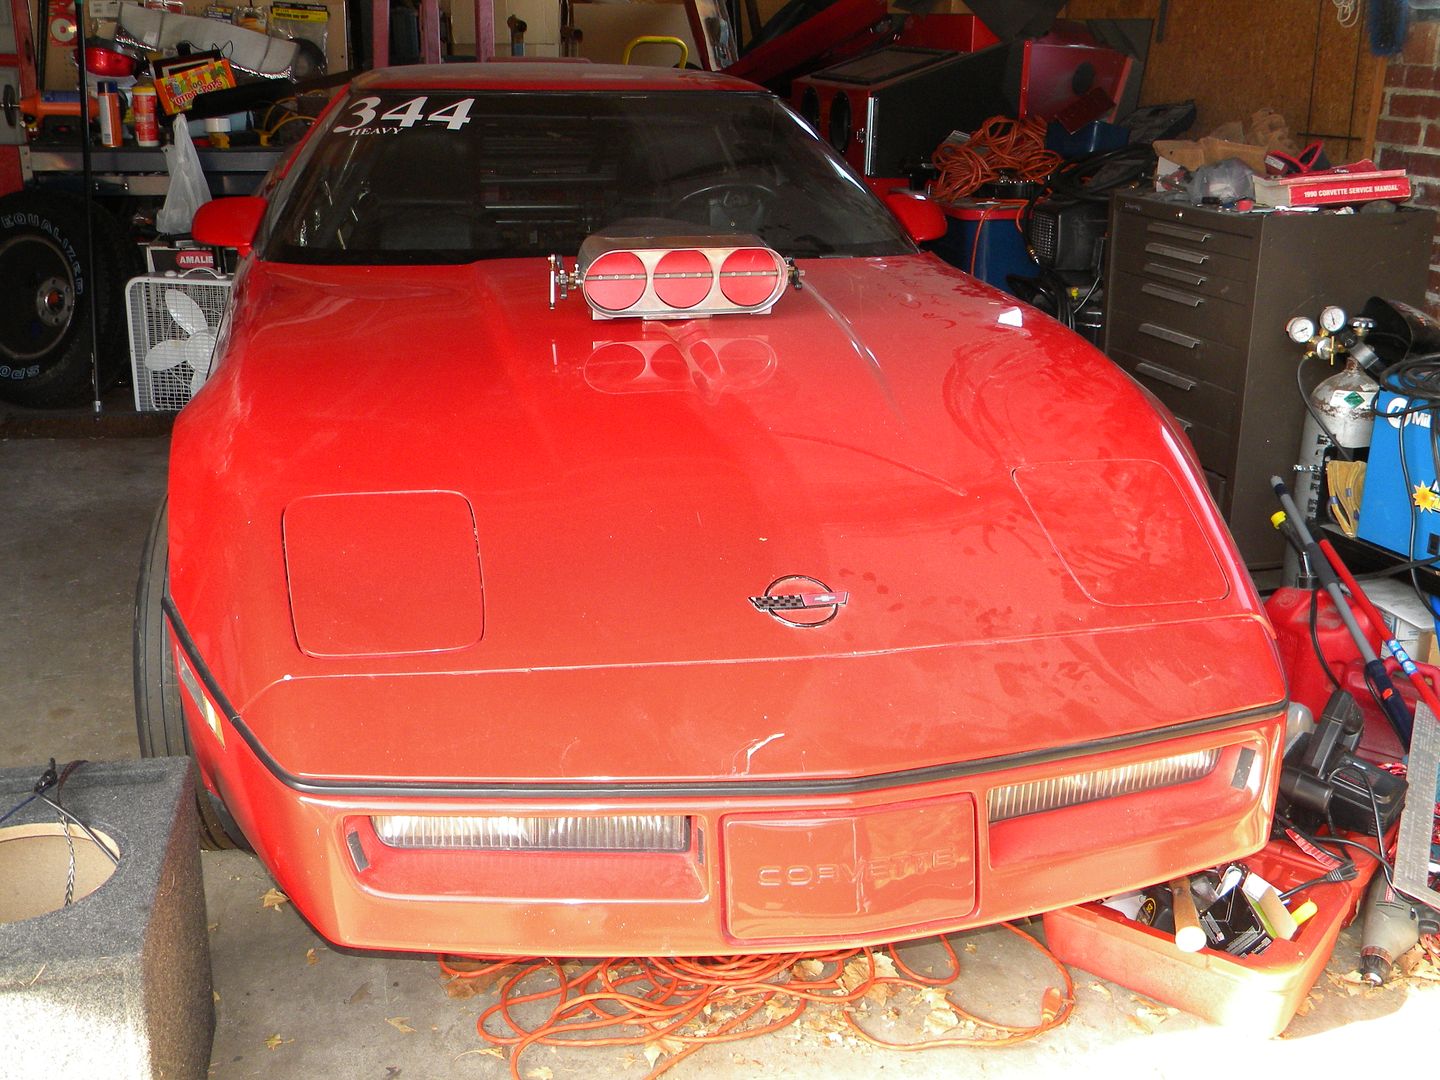 And to give you an idea how big each of those holes in the hat is, that is a 2 liter bottle on top. I am guessing it will flow just a little more air into the Blower than the stock little Throttle Body does into the TPI. 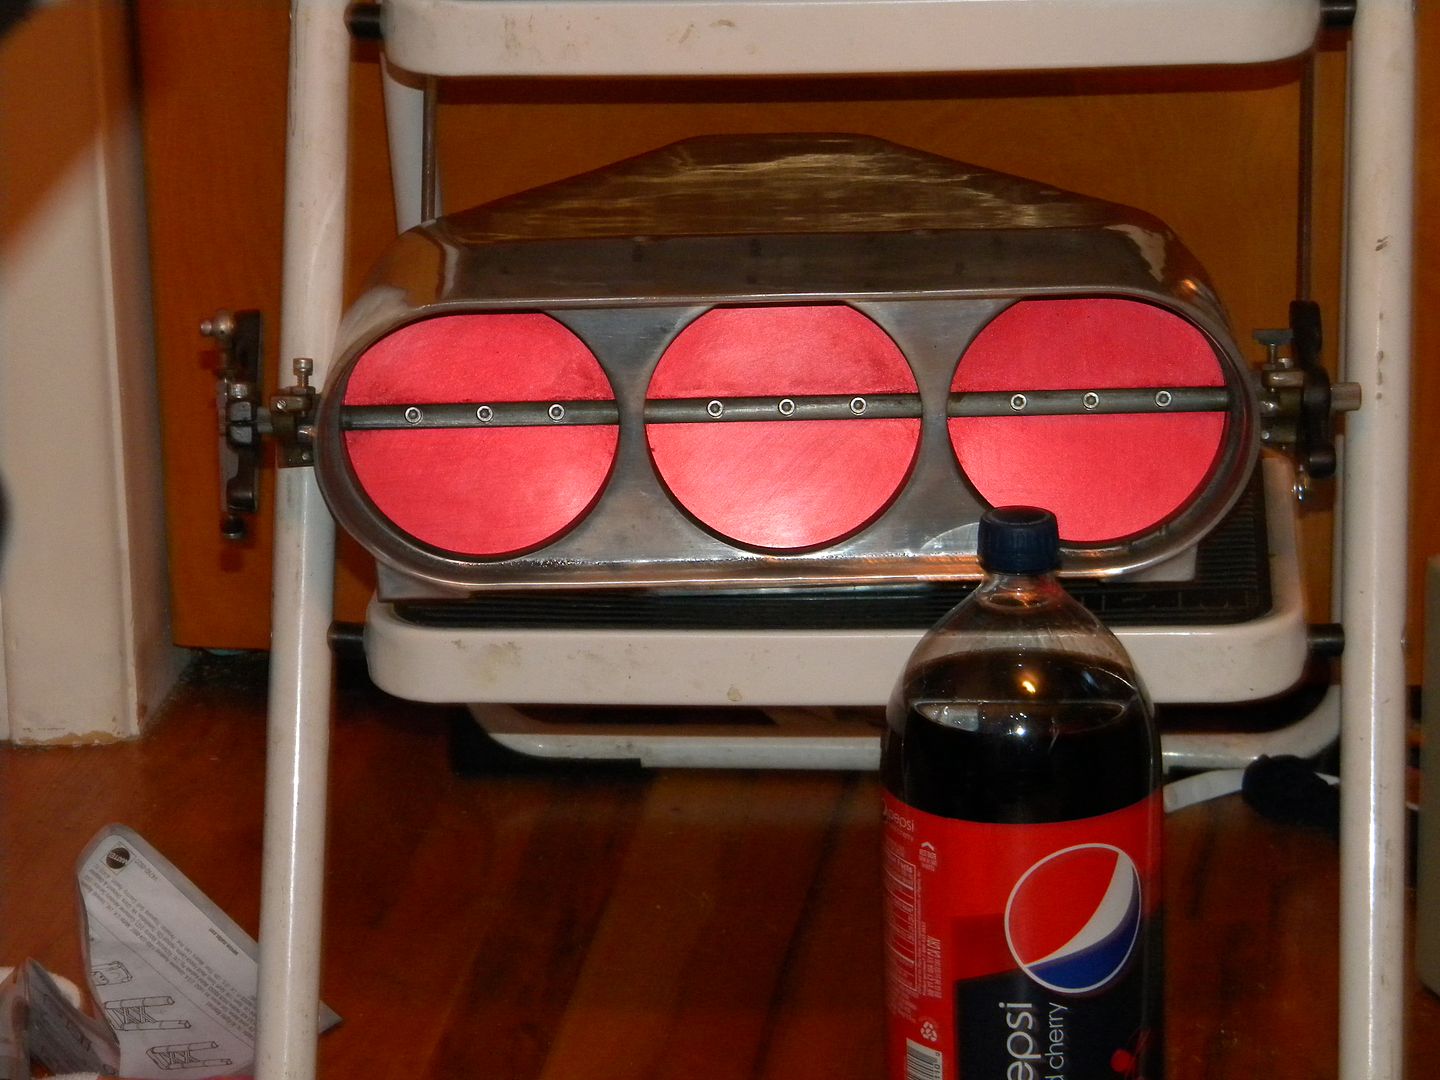 |
|
|
|
Post by tachout on Sept 2, 2012 20:37:13 GMT -7
I know it has been forever since I have done anything on this car.... Had some serious health issues, lost my job, and just have had a hard time getting back on my feet. Been reading all of everyone's post on other forums and I just had to get out there this weekend and get something done. I put some small plans together on things I want to accomplish that I think I can do without having to spend some money. Budget is too tight for me to do it otherwise at the moment. First thing I am going to do is support the back of the body with a pair of nurf bars, with supports. Lets see how far I got today. How it looked when I started: 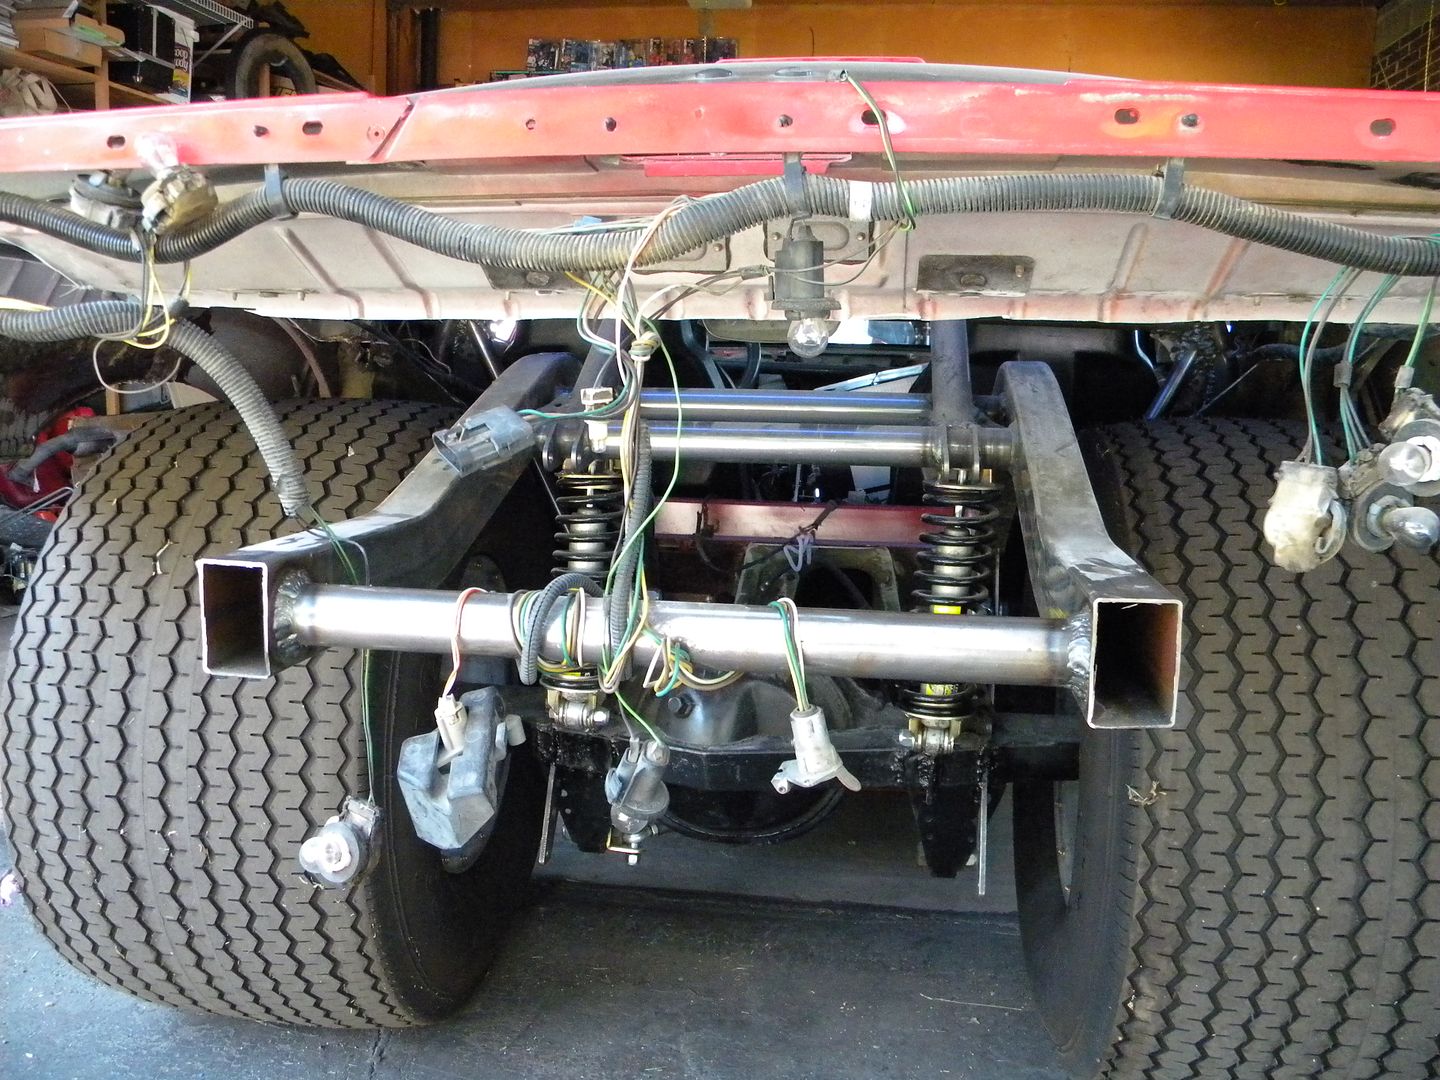 Time to break out the Harbor Freight Special Tube Bender: 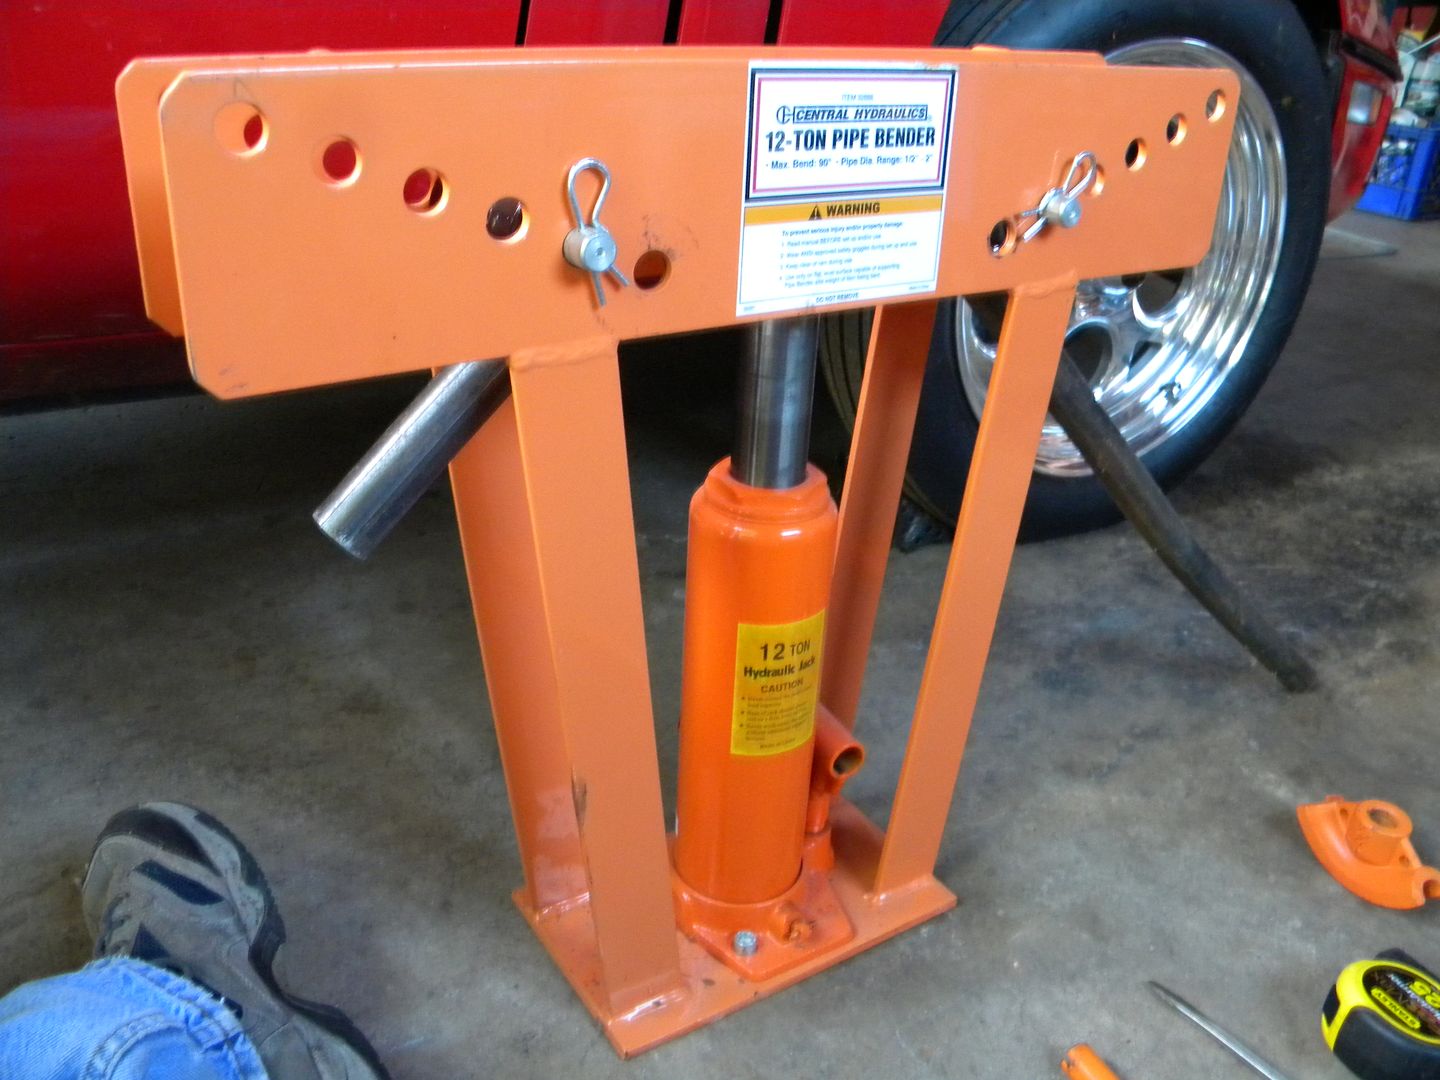 Bent the first bar, and put it up on the frame rail with a C-Clamp to see if I like it. 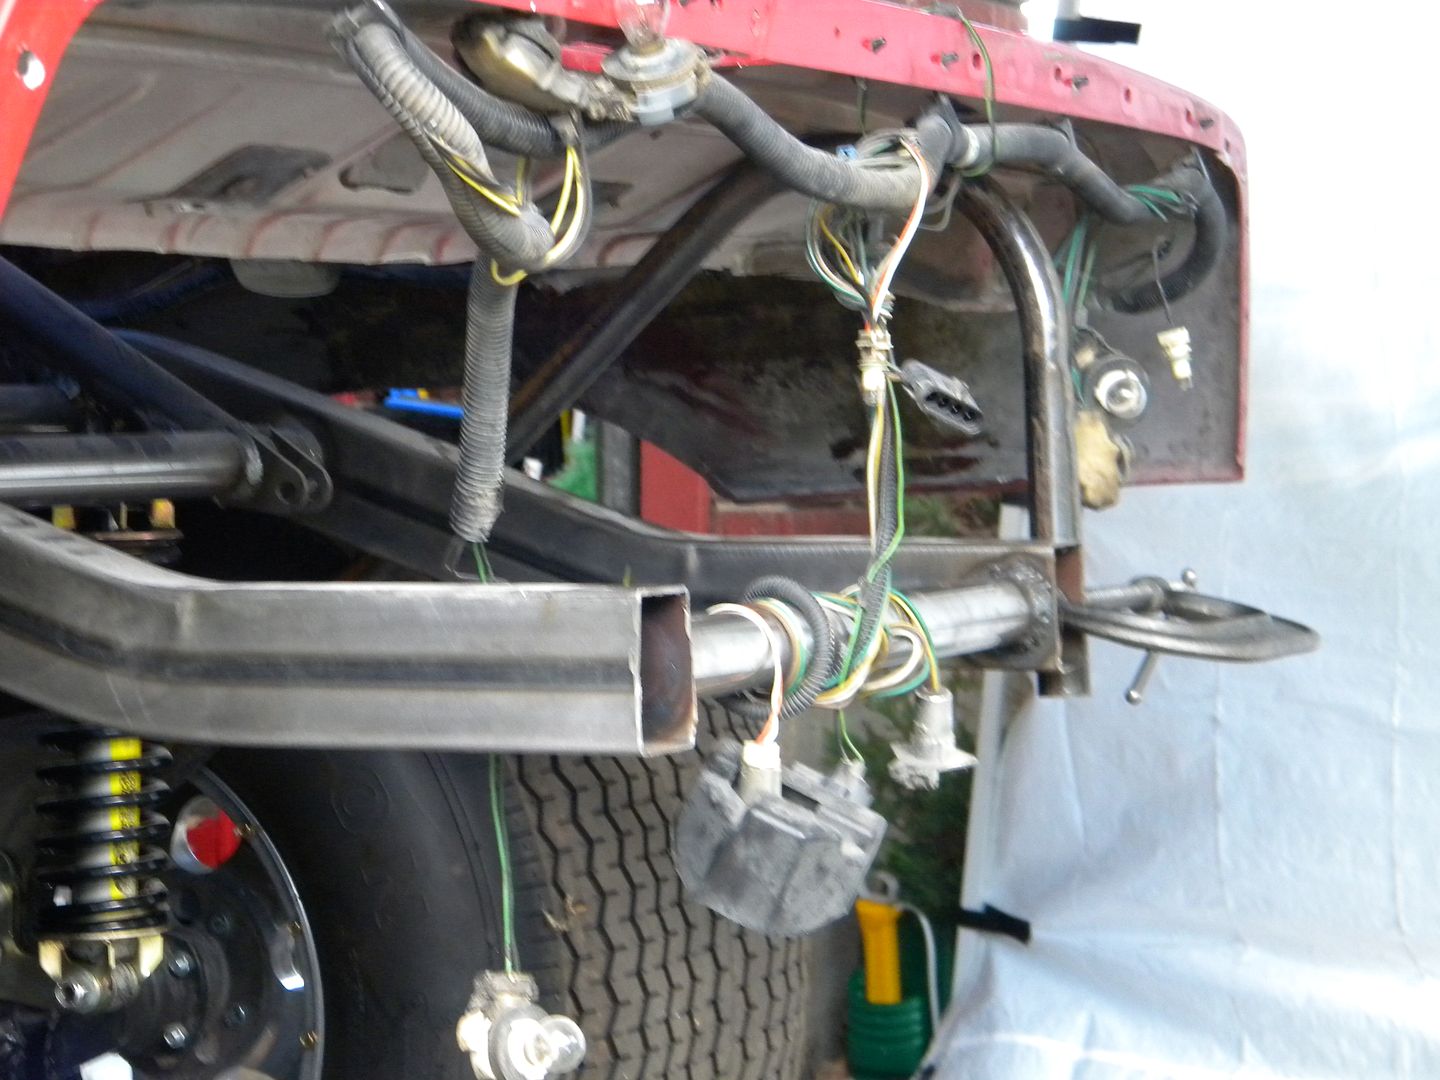 Bend the second bar to make it match the first bar where it counts:  After a bunch of cutting, and grinding to get it to fit, and then welding it in place: 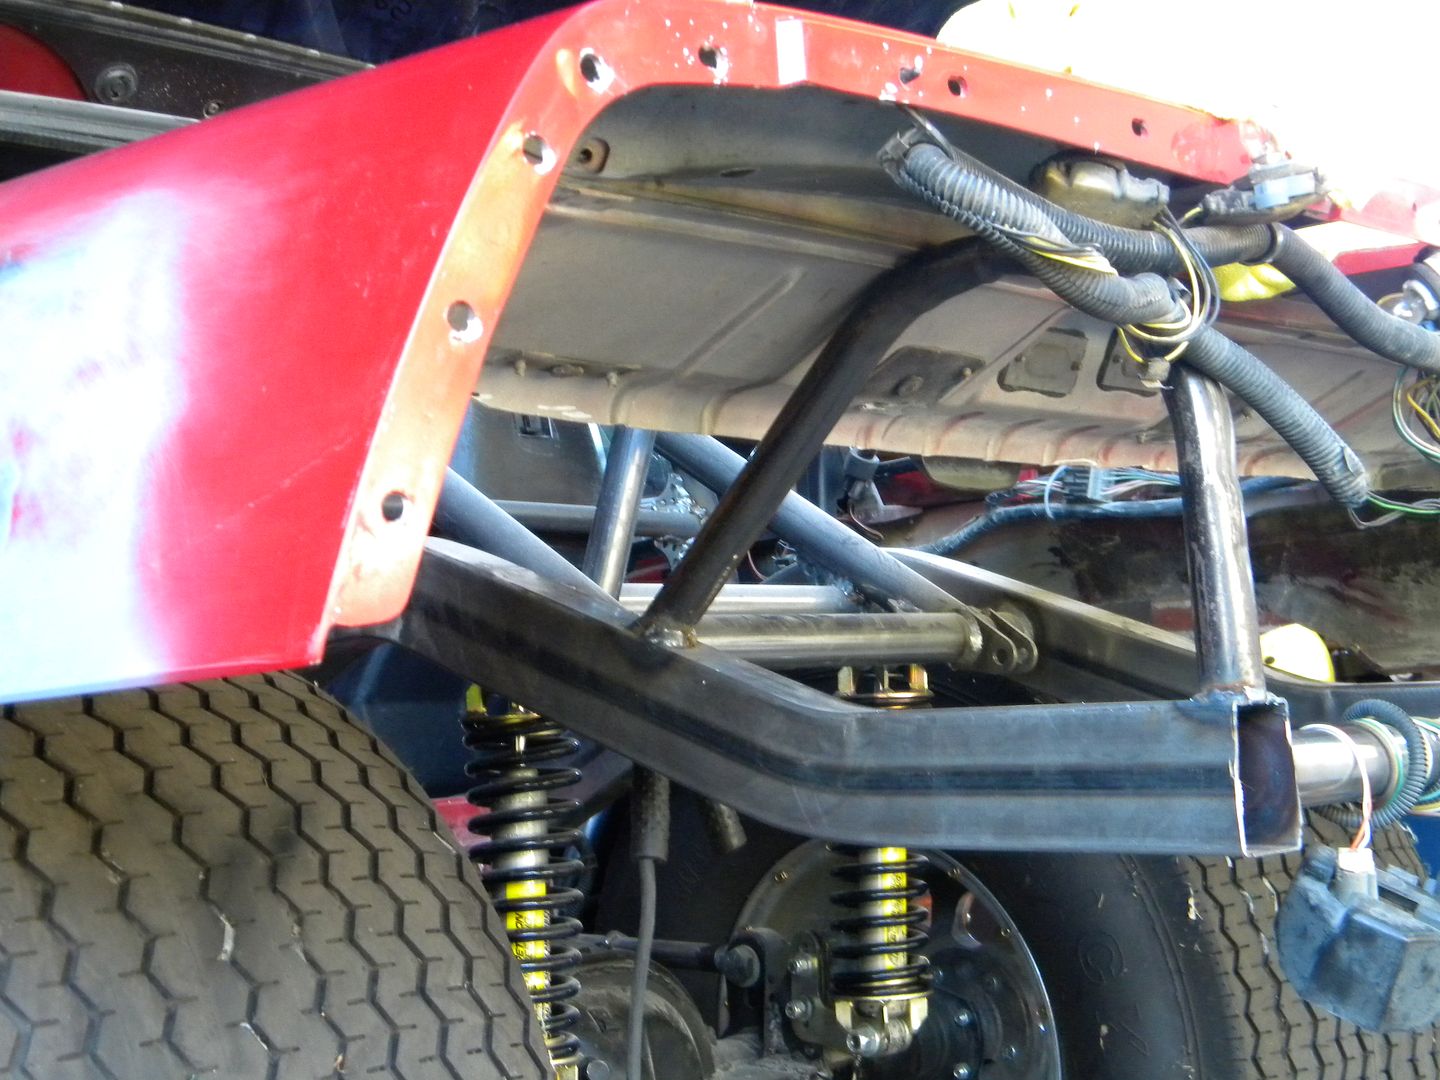 Cut the second one, but have not ground it or welded it in: 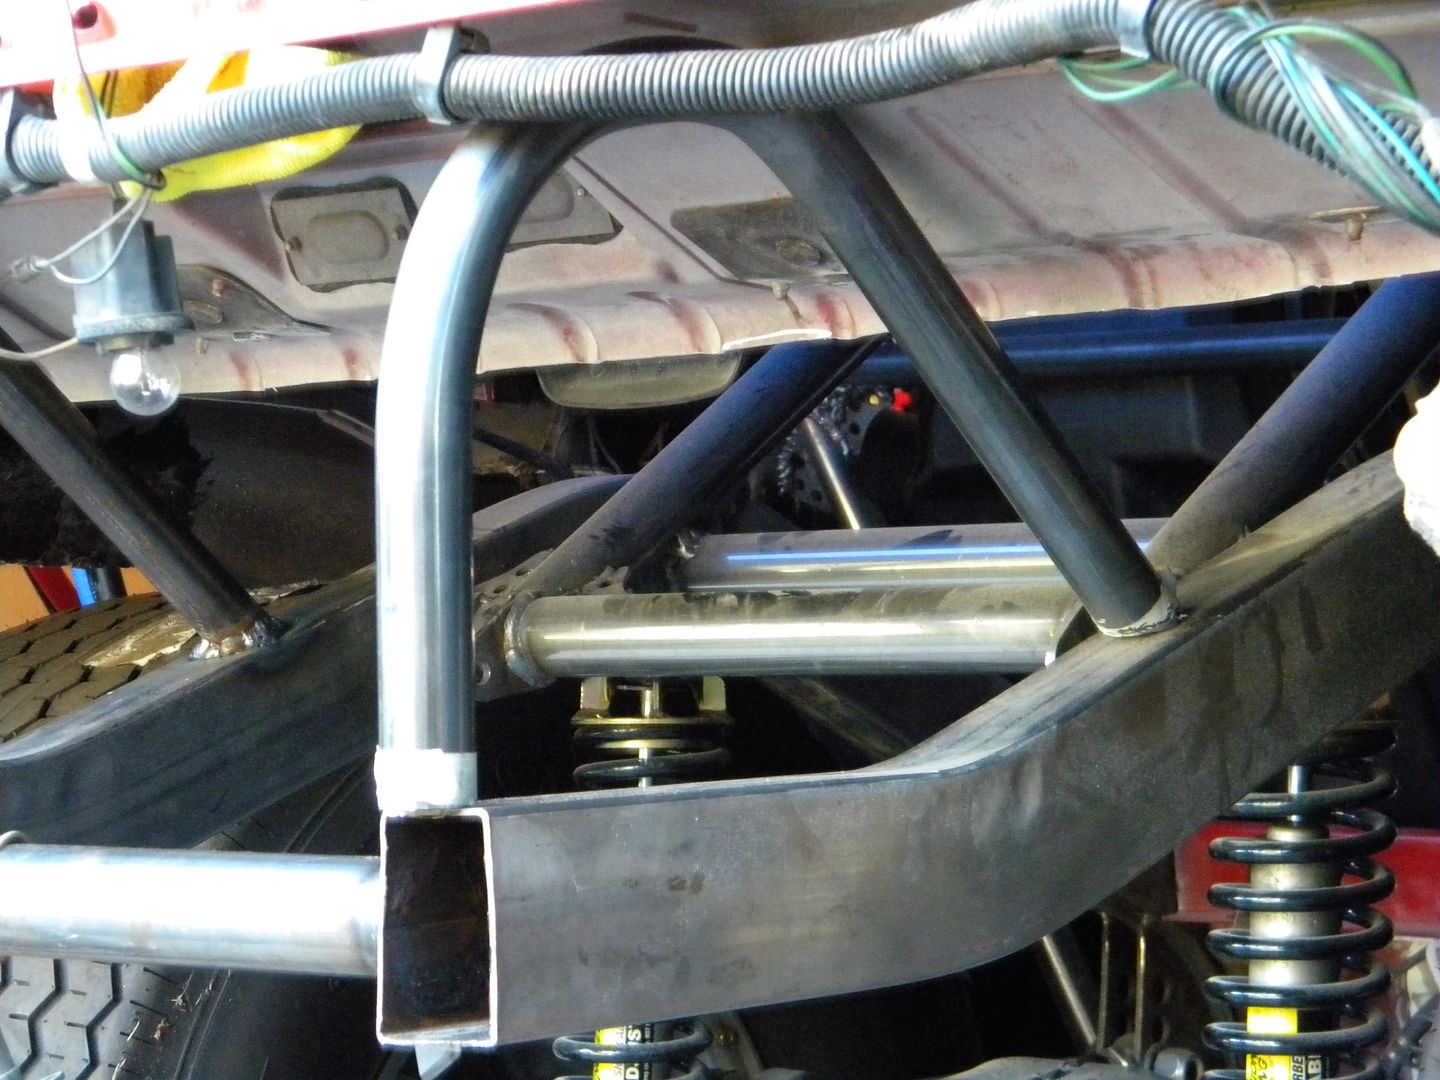 This is what it will look like when welded in place: 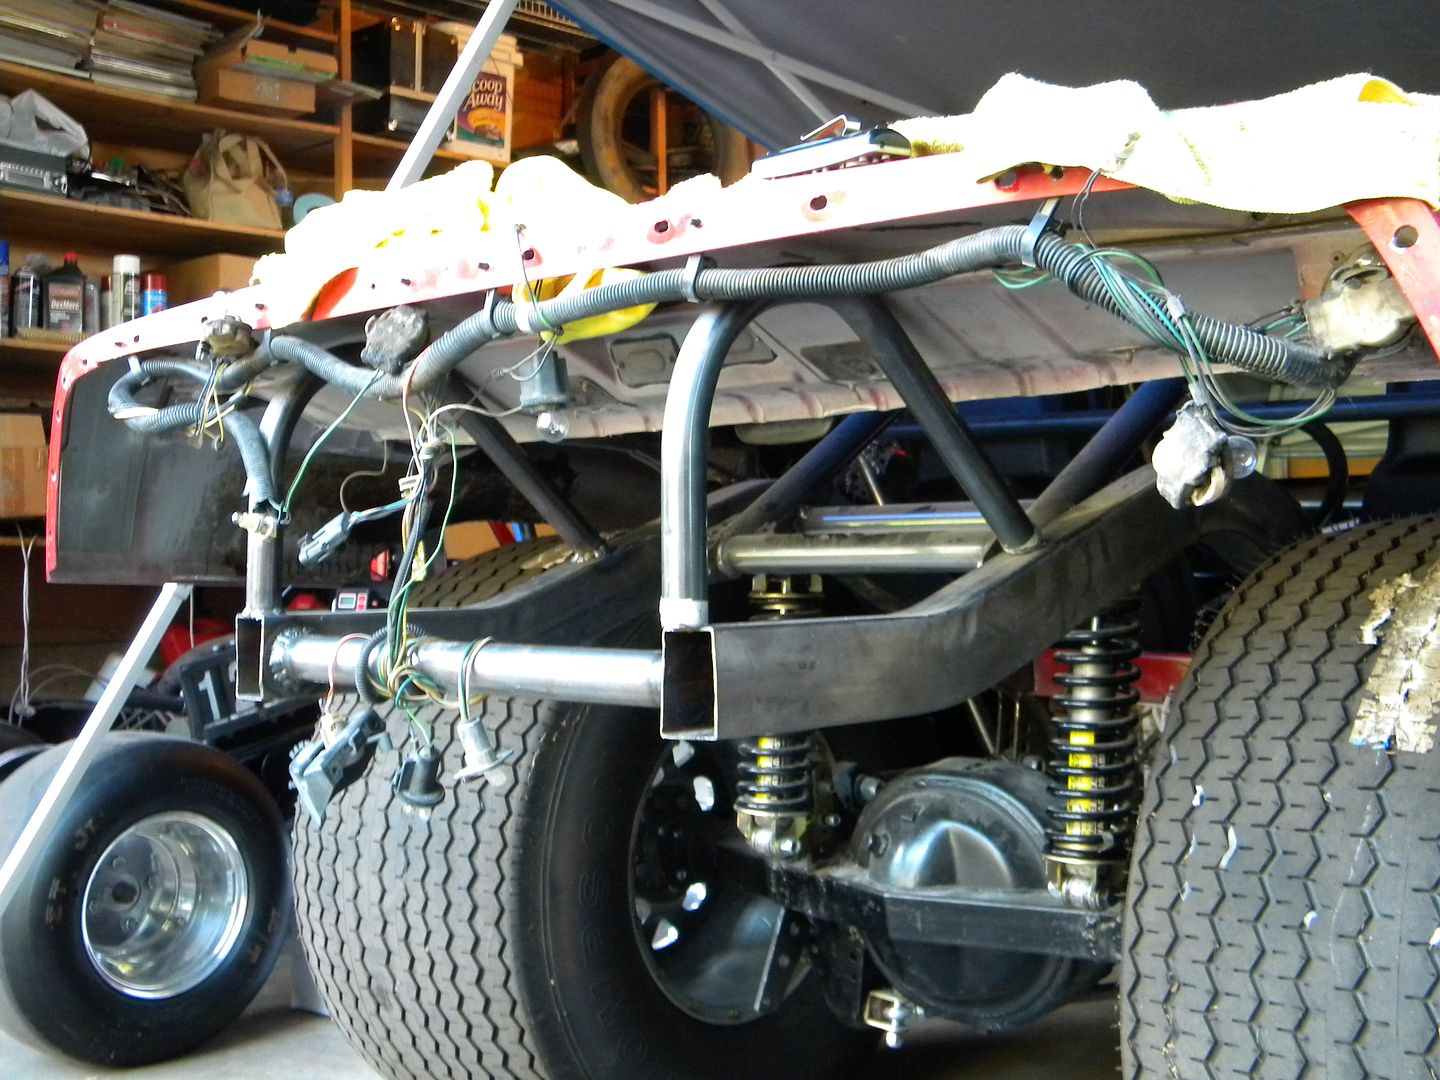 First thing tomorrow I am going to get the bar ground, and then weld it in place. After that I am going to get the bar welded between them. From there I am going to create a rear sheet metal pan. Then get the rear mounts in place to bolt in the rear sheet metal pan on. Once I get that completed, I can then cut fit the tubs, and the interior sheet metal in, and get it buttoned up inside. Once I get that completed, I will pretty much be out of money to work on it for a while. I will either need to get a better job, or get a raise at the job I am at before I can put any more money into it. Just have to work harder I guess. |
|
|
|
Post by tachout on Jan 29, 2013 16:06:23 GMT -7
Have not posted a thing in here is quite some time. Guess it is time. Each year I create education goals for myself, and Life goals, and well I decided this year to also do car build goals.
Here are my goals for this year.
1. Finish rear firewall
2. Complete the body stretch.
3. Buy and install rear fuel cell
4. Install rear tubs
5. Fabricate the rest of the panels needed for the interior
6. Sound deaden the back of the car
7. Do carpet, and pad of rear of car.
8. Buy rest of cage, and get done with the interior parts of the cage.
9. Sound deaden the rest of the interior of the car.
10. Put carpet back in the car to complete the floors
11. Do wiring diagram for car
12. Create rear harness of car.
13. Remove all underhood wiring, and anything not needed of the remaining harnesses.
14. Create front harness.
I am hoping to get this far before the snow flys this next winter.
Other Car related goals for this year.
I plan on enjoying my daughters trips to RMR
I plan on Autorama Jr. Dragster showing
I plan on having several BBQ's and hope to get atleast one to be full of car guys.
|
|